**Updated**
You can now go to the Xfinity App, click on WiFi, click View WiFi Equipment, hit Advanced Settings and Port Forwarding is there. If you are unable to find it there, follow the below.
First of all, doing this can be risky. Make sure you know what you are doing when setting up port forwarding and I’m not responsible for you getting hacked. Second of all, I can’t stand Xfinity. The customer service is atrocious, I was loosing my connection at least once a day and trying to do anything remotely advanced is a pain. But Xfinity is my only choice, it took me a few days of frustration and research to perform a fairly simple task: set port forwarding. You’d think “Oh, navigate to my router’s IP Address, sign in with my admin account and bing-bang-boom” but no. Not even a little bit. You get to your router’s control page, see the settings you want and it’s like “naw dude, use the app.” Ok, fine. I have the app, I’m hip, I’m with it. Fire up the app and this function is nowhere to be found. Guess what it tells you? Connect to your router’s IP address. Round and round she goes. So ok, let’s talk to some robots. I clicked the little AI Chatbot icon and gave a simple query “How do I set up port forwarding?” it brings up options like “Check my internet speed” and “Troubleshoot my network.” Which the observant reader may notice this has nothing to do with my question.
A lot of the information on YouTube and Google is outdated, pointing me to the same loop of logging into the router which leads me to the app like before. I ended up filtering my Google search to only posts from this year and finding a post on the Xfinity Forum with a user with an answer. Shout out to jesserbyars who figured this out. Read the original post here or see instructions below.
- Open the Xfinity app.
- Click on the Security tab at the bottom right.
- At your own risk, turn off advanced security. If you dare!
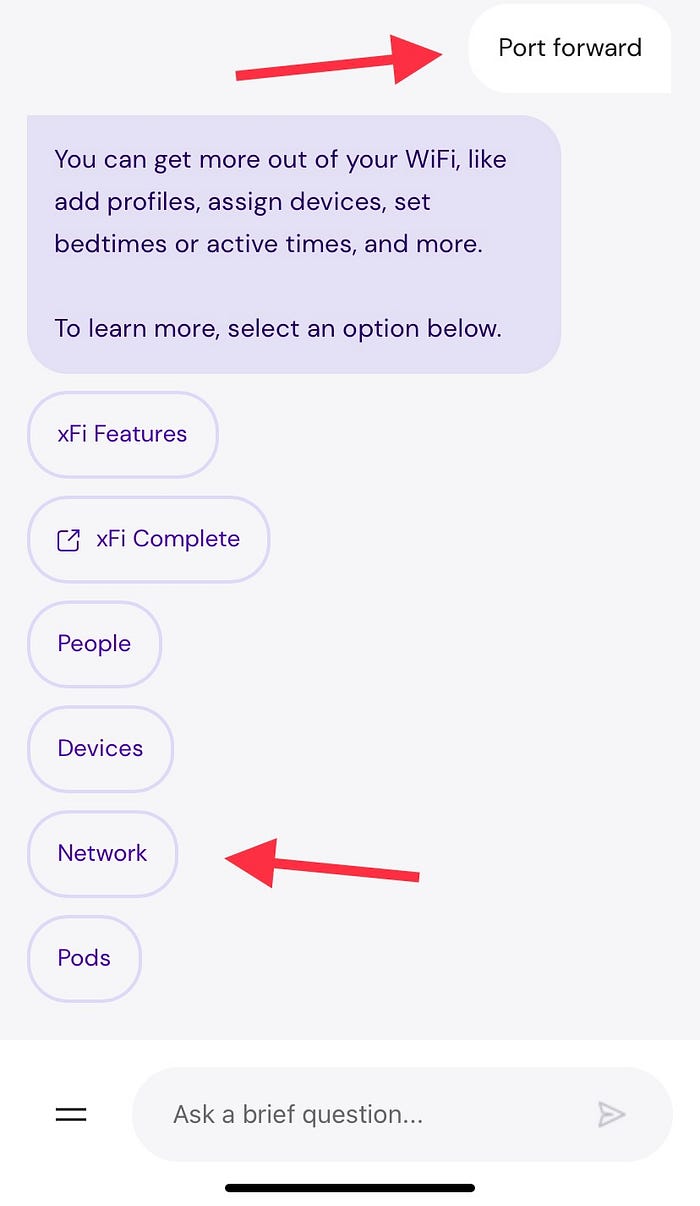
- Now, let’s head back to the last place you would think, the AI Chatbot.
- Type in “port forward” not “port forwarding” to bring up options.
- Click on “Networks”

7. Click “Open advanced settings”

8. Lo and behold, the option we seek. Click on that sweet, sweet “Port forwarding” which if you remember, searching for that exact phrasing did not bring us anywhere near this option. You can also play with the DMZ, DNS, Wi-Fi Channels, WAN and LAN settings from here.

Once you’ve clicked on the “Port forwarding” option, you can search for which device on your network you would like to set port forwarding to from there.
I hope this saved you some time and stress, best of luck not getting hacked.